


50 9x7in GB National Flag Film

£34.50
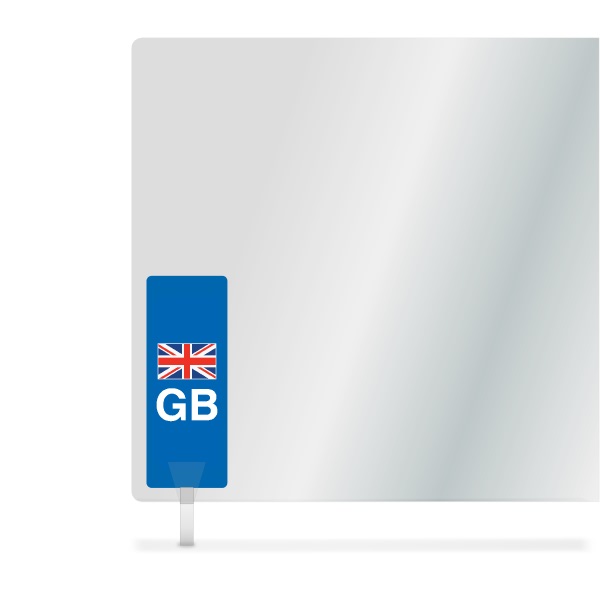
Packs of 50 9x7in GB National Flag Film include a GB & Union Flag on a blue background.
- Description
- Additional information
Description
Our 9x7in GB National Flag Film sheets are UV stable for colour fastness and highly durable. In addition, it comes with a blue side badge showing the Union Flag and GB Text. But don’t forget, you need to set up your plates software to accommodate the pre-printed badge.
- Size: 9x7in / 229x178mm – Motorcycle
- Style: Blue GB National Flag
- Position: Half Height at Bottom Left
- Pack: 50 Clear Film Sheets
- Printable: Yes
- Film Plates: Laminate to 9x7in LG EnviroPlate.
- 3-Part: Match with 9x7in Clear Acrylic & Wet Reflective.
9x7in GB National Flag Film comes in a packs of 50 film sheets, pre-printed with a blue side badge. Because it’s pre-printed, you will not need to use a white badge panel. And our National Flag designs are road legal on UK. So a UK Oval Sticker must be displayed if driving overseas. Tennants matched components are covered by our BSAU145e certification, as shown on our website.
BSAU 145e Compliant

A Clear Film sheet makes both Film and 3-Part Number Plates. And is certified to British Standards, but only when you match it to specific components. Such as a 3mm LG EnviroPlate or when making 3-Part plates, between an acrylic face & wet reflective.
For more information on standards, regulations and our testing regime, check out our main site and the number plates pages or knowledge base.
Making Number Plates

Make a number plate using our 3 step process.
1: Design 2: Print 3: Assemble
Build it in our software, then print it out and simply assemble the matched components together.
Assemble with a Jig & Roller
Whenever you make a printed number plate, we recommend using a jig and roller for a professional finish.
Film Plates
- Start by applying any Badge Panels to your printed Clear Film, for colour correction.
- Then use the pins and place your rigid LG EnviroPlate, face up on to the jig.
- Fold back a few centimetres of the adhesive cover at the end of the plate.
- Next, line up your Clear Film sheet on top, with the printed side facing downwards.
- Carefully join the components together at the Exposed Adhesive edge.
- Ensure both the edge and sides are correctly lined up before joining together.
- Now slide the two parts towards the Rollers at the end of the jig.
- Slowly Wind the arm so the components are fed through, keeping hold of the folded adhesive cover.
- This will remove the adhesive cover and Bond the two parts together.
3-Part Plates
- Place your Clear Film sheet, printed face up on the roller jig.
- Fold back a few centimetres of the adhesive cover at the end of an Acrylic Face.
- Position the Acrylic above the Film, Adhesive Side Down and carefully join the two pieces together
- Leading with the joined edge, keep hold of the Fold and slowly wind the arm & Feed the parts through the roller.
- This will remove the adhesive cover and bond the two parts together.
- Next, put a Wet Reflective adhesive face up on the jig, folding back part of its cover.
- Position the parts joined earlier on top with the Film Facing Down, join them together at the exposed edge
- Once again Feed them through the rollers, keeping hold of the folded adhesive cover.
- Finally, remove the final protective cover from the Acrylic Face.
Additional information
| Dimensions | 229 × 178 × 0.3 mm |
|---|---|
| Media Type | Clear Film, Blue Badge |
| Product Brand | Tennants UK |


